photographer

Find a new image for the App Tile Icon in the D365 Unified Interface

When creating a Dynamics 365 App in the App Designer, you can use the default image for the App Tile Icon, but it’s kind of boring. It’s pretty easy to choose a new image, but it’s not so easy to tell which one to use. There are a LOT of objects in the list, and it’s not obvious what they all are.

Here’s a way to quickly find the one you want:

  1. In the App Launcher window, right-click on the image you want, and select Copy Image Address (or copy image link).
  2. Paste the link into Notepad, and look at the file name at the end of the link. For example, if the link is https://myinstance.crm.dynamics.com/ %7b637699584630000145%7d/
    webresources/msdyn_/Images/Legacy_Crm_Icon.png, then the file name we’re looking for is “Legacy_Crm_Icon.png.”
  3. Open the app in the App Designer. Click on the Properties tab.
  4. Uncheck the default image box, and search for the image name. In this example, the name in the list appears as “Legacy_Crm_Icon.png”.
  5. Select the image, and save and publish the app.

Here is a list of the common images:

  • Sales: Dynamics Sales Icon, SalesPro App Icon
  • Service: CustomerServiceHub/_imgs/AppIcon/CustomerServiceHubIcon.svg
  • Legacy D365 Logo: Legacy_Crm_Icon.png
  • Sales Team Member: Dynamics Icon Sales Team Member

“AI Builder” error with Scan Business Card

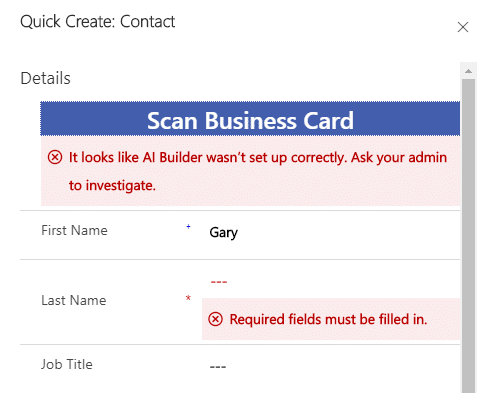
Our customer had recently switched over to the Unified Interface for Dynamics 365 Sales. The Quick Create form for Contacts has a nice new feature for scanning a business card, but when they clicked the Scan Business Card button, they got an error: “It looks like AI Builder wasn’t set up correctly. Ask your admin to investigate.”

AI Builder error

So I investigated. A Google search turned up a few similar errors but nothing on point. I tested the button with a user who had the System Administrator role, and that worked fine.

Focusing on permissions, I remembered that one of the posts said they had solved the problem by assigning the the Read privilege for the AI Model entity. Another post said that assigning the Common Data Service (CDS) Security Role had resolved it.

I tried assigning the Read privilege for AI Model, but that was not enough. Assigning the CDS Security Role was not appropriate for this user, but I noticed that the CDS role assigns some additional privileges related to the AI Model.

Taking my cue from those assignments, I was able to resolve the error by assigning the following privileges to the user’s security role. You can find them on the security role’s Custom Entities tab.

EntityPrivilegeScope
AI ModelReadUser
AI Object Detection LabelReadOrganization
AI TemplateReadOrganization
AI Privileges

Membership

“Not a member of this organization”? Force user synchronization to Dynamics 365.

It should be automatic. When you assign a Dynamics 365 Customer Engagement license to one of your users in Active Directory, the system will add the corresponding System User record in Dynamics 365 CE.

Occasionally, this doesn’t happen correctly. We saw this recently when setting up a trial instance for a customer’s CRM. The environment had been created, and the license had been assigned, but the user could not launch Dynamics 365 CE, despite having the Global Administrator role in the Office 365 portal. 

The error received was:

You are not a member of this organization

You (username@contoso.com) do not belong to the organization contoso.
Verify the organization name and try to sign in again.
    • Error Code: notMemberOfOrg

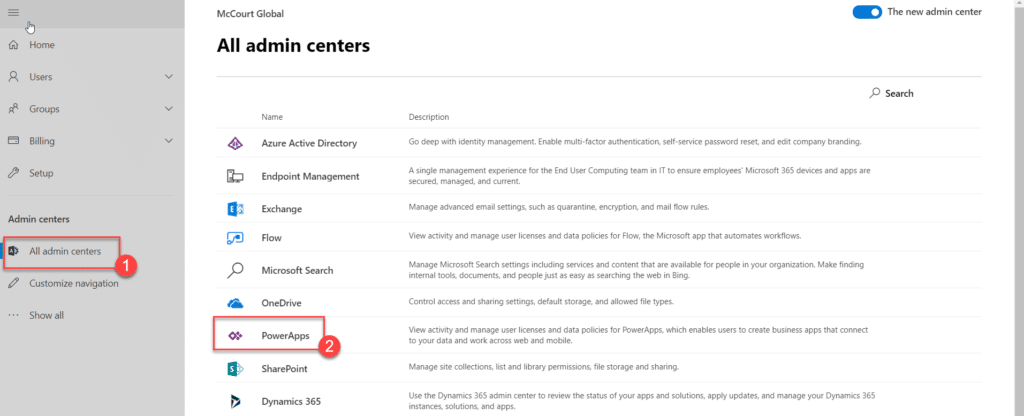
Fortunately, Microsoft has provided a way to force AD to synchronize the user record. This feature was still in Preview at the time of this posting, but it solved our problem. Go to the PowerApps Admin Center in your tenant by clicking on the Admin icon in the Dynamics 365 App Launcher, and then click on All Admin Centers. Click on Power Apps icon to the launch the admin center.

PowerApps Admin Centers

Click on the Environment record to open it.

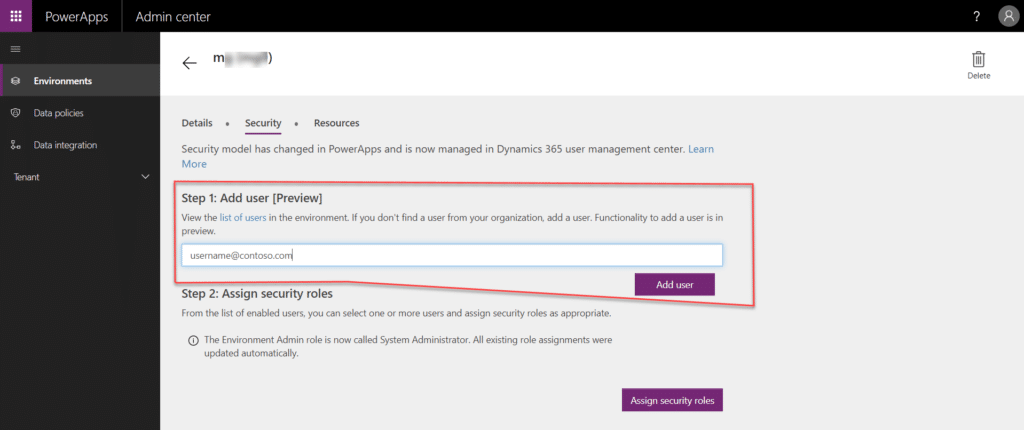
Click on the Security tab. Enter the email address of the user in the Step 1 box. Click Add User.

Add user

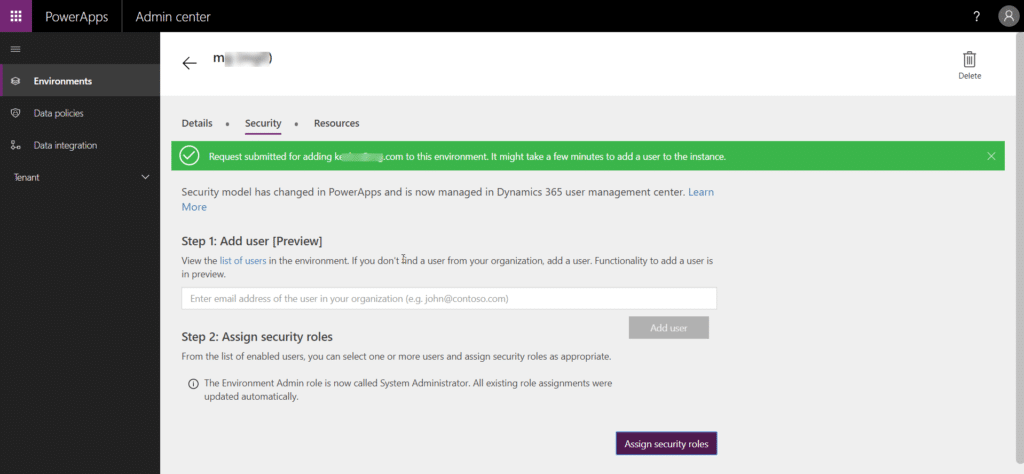
A confirmation banner will be displayed as show below. It may take a few minutes for the user to synchronize from AD, but when you click on the “list of users” link, you should see your user record in Dynamics 365 CE. Assign the appropriate security role(s) and carry on.

Confirmation

401 Unauthorized Error When Accessing SharePoint Document Folder

Our Sharepoint/D365 Sales integration worked great, until one day it didn’t.

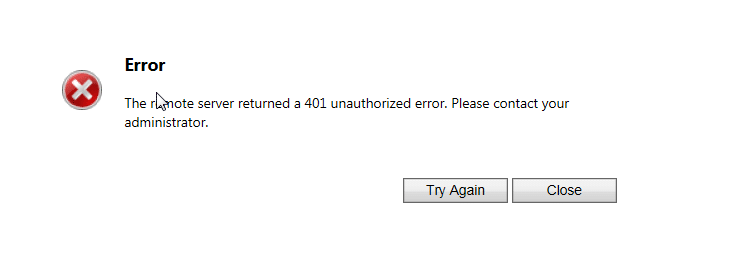
When trying to access a document folder, and also when trying to run the “Enable Server-Based SharePoint integration wizard, “we got the following error: “The remote server returned a 401 unauthorized error.”

401 error

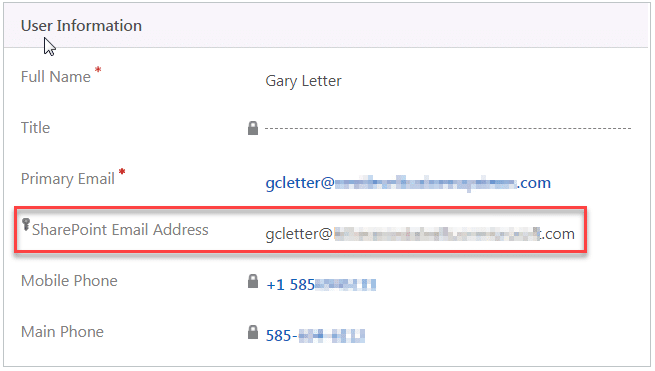
This was odd, because Sharepoint had previously been configured successfully, and the user had been able to store documents under the entity for many months prior. The solution turned out to be entering the user’s email address on the System User form.

By default, the SharePoint Email Address field is not exposed on the System User main form. You will have to customize the form to expose the field, and then you can populate it.

Once you have customized the form, go to Settings -> Security -> Users. Open the user record, and enter the email address with which the user is logging into Dynamics 365 in the SharePoint Email Address field . Usually, but not always, this is the same address as in the Primary Email field. Save the user record.

Then test access to the Documents folder again. The change should take effect immediately, and you will be back in business.


business_women_puzzle

Undefined error loading Bookable Resource form

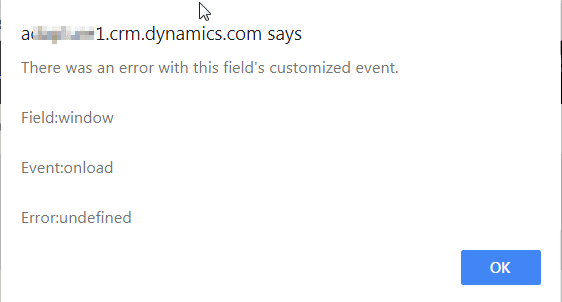
Recently, we encountered an error in Dynamics 365 Project Service Automation. Whenever the Bookable Resource form was loaded, an undefined error popped up saying there was an error with “this field’s customized event.” However, there was no information on which field the error referenced.

Bookable Resource error message

After some investigation, the error was finally traced by Microsoft support to the Legacy Form Rendering setting. Once Legacy Form Rendering was turned off, the error disappeared.

To change this setting, go to Settings -> Administration -> System Settings. On the General Tab, if “Use Legacy Form Rendering” is set to Yes, set it to No.


Solve puzzle

Identify the Technical Name of a Field on a Form

When you are customizing a form in Dynamics 365, it’s not always clear how to identify the name of the field in the database. Some are clear; fields like “Subject” and “Description” usually have the same label as the technical name of the field. But what about a field like “Due Date”? The Display Name is not the same as the technical name, and the label on the form might not even match the Display Name.

The easiest way to find the technical name is to use the Form editor.

Let’s try it. On the Task form, click the Form button to open the editor. When the window opens, double-click on the field to open the Field Properties. Click on the Details tab to see the Display Name and the technical name of the field.

On the Task/Due field, for example, we can see that although the field is labeled “Due” on the Task form, the Display Name is “Due Date” and the technical name is “scheduledend”.

Field Properties


migration

How to Migrate Dynamics 365 Sales from One Tenant to Another

Migrating Dynamics 365 Sales to a new tenant must be done by Microsoft Support. The first step is to open a support ticket through the Office 365 portal to request the migration. (UPDATE: Microsoft does not yet support tenant-to-tenant migrations for version 9.0 organizations. This is expected to be available in Q2 2019.)

Once they have confirmed the specific information about the source and target tenants, MS Support will ask you to request a date and time for the migration. The date must be at least two days in advance. They will then schedule the specific date and time of the migration.

Microsoft support will need some information from you to validate and perform the migration. At a minimum, be prepared to supply the following. You can save a step by including it in the initial support request:

  • Are the Source tenant and Destination tenant in different Regions (NA, APAC, EMEA)? If so, then indicate the region of both the source and target tenants.
  • Is Voice of the Customer installed in either organization?
  • For each organization, what is the:
    • URL
    • Unique organization name
    • Organization ID

The URL is the same one you use to log in, typically <YourOrg>.crm. dynamics.com. You can find the Organization Name and ID by going to Settings -> Customizations -> Developer Resources -> Instant Reference Information.

What to do before you enable Relevance Search

Relevance search uses Azure to index your CRM data. This means that you are exposing the data to a service external to your CRM instance, so you need to take that into account before you enable Relevance Search. You may have entities and fields that you do NOT want to expose this way because they contain confidential information.

More information can be found in this TechNet article, which says:

We strongly recommend that you configure the entities and entity fields participating in Relevance Search before you enable the search, to prevent sensitive data from being indexed in a service external to Microsoft Dynamics 365 (online). “

On a global basis, Relevance Search is enabled in System Settings. The user selects it in Personal Options -> General -> Search Experience.

Field Security issue copying CRM production instance to sandbox

We recently ran into an issue restoring the a production CRM instance to the corresponding sandbox instance. Although the field security profiles appeared to be copied correctly, the secured fields were not accessible, even with the System Administrator security role.

The workaround is to:

  1. Toggle field security off on the field and save it.
  2. Toggle field security back on and save it.

Do this for each secured field. Then rebuild the Field Security profiles.